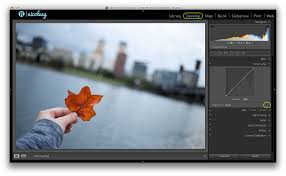
How to Create a Vintage Photo Effect Using Adobe Lightroom
There’s something about retro and vintage that feels ironically timeless.
As digital access to music exploded, vinyl sales soared. As futuristic glass tower blocks are built around cities, 19th-century gentrified warehouses become the hippest hangouts. And as everyone became a smartphone photographer, vintage photo manipulation apps became ever-popular.
It’s easier than you think to make your photos look like retro film photos in Adobe Lightroom. You can make these changes as subtle as you want. In this article, I’ll show you how to do just that—but first, a little about why faux-vintage photography has become so popular.
Faux-The Appeal of Vintage Photos
This appeal of retro, or faux-vintage, vegetable-tanned leather bags is different from the hipster culture that has become so ubiquitous. That being said, there are overlaps in the perceived values of creativity and authenticity, but these may be expressed more subtly than Instagram filters.
Nathan Jurgensen argues similarly in his breakdown of the rise of the fake-vintage photo. Anything made of bits and bytes is abundant in the digital age. Anything with materiality is becoming increasingly rare, and therefore valuable. But those physical things (such as film photos) that survive often do so for a reason. Because of the stories behind them, their quality, or the feelings they evoke.
These are feelings that are very hard to come by for an amateur photographer using a smartphone camera.
This plethora of mediocre photos often fails to generate any meaningful response. But a well-made vintage effect that mimics the physicality of film can evoke a nostalgia that haunts a well-told story or a memorable one—such as vignettes and radial filters. Black and white photography can create awe and excitement.
Creating this kind of nostalgic effect is incredibly limited in an app like Instagram. However with a few tricks, you can create amazing photos on Instagram. If you have access to Adobe Lightroom, however, you can accomplish a lot while keeping your photos at full resolution.
How to make a retro photo in Lightroom
One of the main differences between old film photos and digital photos can be seen in the dark areas of your image. In digital photos, true blacks are stronger. In old film photos, they are very soft with a matte effect.
We’ll show you what it looks like using a picture taken on an iPhone. Here’s the original. Note how strong the black area at the top of the image is.
To quickly soften these areas of black, open your photo in Lightroom’s Develop module. Go to the Tone Curve widget.
Spend some time playing with the left side of the tone curve to see the effect you can get. You can quickly flick between your photos before and after editing by pressing Backslash (\) as you’re doing this. To undo any changes, press Ctrl + V on Windows or Cmd + V on Mac.
To create a matte look, we click on the tone curve just below the center point. This creates a pivot point, meaning that the shadows of the image can be manipulated without actually touching the highlights. Then, drag the bottom of the curve upwards until you get the effect you want.
As you can see, the blues have retained their vibrancy, but the black areas are now much softer. For some people, this subtle change is all they need to make their images look a little more film-like.
Additional Lightroom Settings for a Vintage Look
If you still can’t get the effect you want after using only the Tone Curve, you might want to play with some of the other settings as well. The one you’ll use the most will be in the basic widget. With these settings, you can make your photo look more (and hopefully better) like that.
Below are the exact settings we used to achieve this effect (it may not be your style, but with these settings, it should be easy to tweak the numbers to find one you like). These settings are above the tone curve shown earlier.
The main settings here are exposure, contrast, highlights, shadows, and vibrance.
Exposure affects the mid-tones in your photo. That is the central region of the tone curve. If your photo is underexposed, you’ll want to brighten it up with a higher exposure. If it’s overexposed, you’ll want to tone down those mid-tones by pulling back that exposure a bit.
Contrast is the setting that helps make the dark and light areas of your picture more distinct. As you increase the contrast, more detail will come to the fore, and different elements within the image will become more distinct.
Highlights and shadows go hand in hand. If you want to squeeze more detail out of your highlights (the bright points in your image), you’ll need to drag the Highlights slider to the left. If you want to extract more detail from the shadows (the dark areas of your image), you can drag the Shadows slider to the right.
